
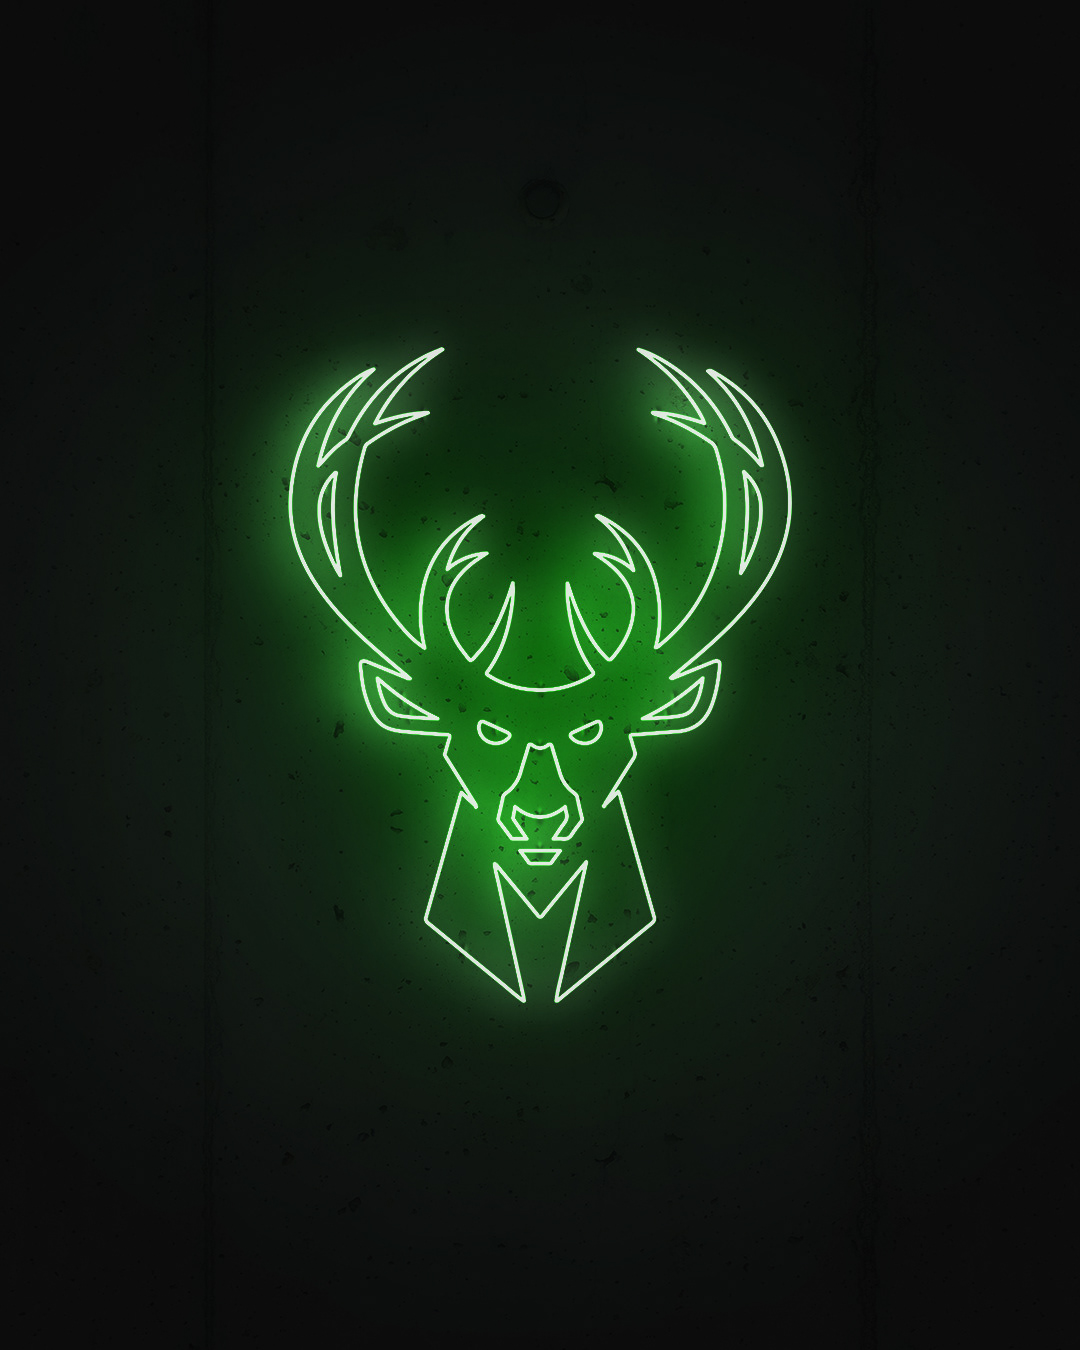
I wanted to try out a neon effect, and since the Milwaukee Bucks were in the 2019 playoffs, why not make a neon sign of their new logo. First part of this was downloading a high quality image of the Bucks new logo and bring that into Adobe Illustrator. Where I then used the image trace tool to get just the outlines of the image instead of all the colors being filled in. I exported that out as a PNG and then opened it up in Adobe Photoshop.
In Photoshop I scaled up the PNG to my liking, and then I found an image of a concrete wall for the sign to be hanging on and used that as my background for the sign. All of the neon effect besides the glow on the wall was made using the layer styles for the PNG of the Bucks logo. Opening up the layer styles dialog box brings up a bunch of options and I ended up using these ones: bevel & emboss, inner shadow, inner glow, color overlay, outer glow, and then two drop shadows. The bevel & emboss makes it so the lines are more like swept tubes like a neon sign and adds that 3D effect to them. The inner shadow and glow and the outer glow is like the color of the neon sign itself, and I went with a nice darker green because it is the Bucks logo. The color overlay is used to give that hard white line that neon signs have when they are turned on. Then the drop shadows are glows going backwards onto the wall. Now to make it seem like the sign is on in a dark room, I added a radial gradient overlay to this image with the green and black and set that under the concrete image and made sure the concrete image had the multiply blend mode.
For some more details I painted in little black lines with a brush for the sign to have wall mounts, and used the bevel & emboss layer style to add a little extra detail. I also then combined all the layers and duplicated them to add some blur and make it more contrasty with different blending modes.